How to Clean Your Hearing Aids
Your hearing aids can become exposed to a number of things that can make them dirty, including wax, moisture, and dirt. While you may think it is only an issue of hygiene, having dirty hearing aids can also affect their ability to function. Furthermore, by regularly cleaning your hearing aids, you can prevent any potential issues that may arise. Our ears are naturally moist due to sweat and wax meaning that having dirty hearing aids is inevitable.
In fac t, wax is the most common reason for hearing aids malfunctioning and requiring repair.
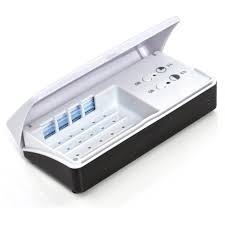
There are various things you can do regularly to prolong the life and quality of your hearing aids. These include ensuring that when you are not using them, that you leave them in a dry and cool place, and investing in accessories for your hearing aid such as a dehumidifier and drying containers to remove the moisture. Ensure that you open the battery door open when you store them to ventilate them further, as well as preserve hearing aid battery life.
For cleaning hearing aids, you can regularly and carefully wipe them down with a dry cloth to remove any obvious, outer wax and moisture. Furthermore, avoid water and any cleaning agents as they may damage your hearing aid. Ensure that your hands are also clean and dry before attempting to clean your hearing aids. In this article, we will be discussing tips on how to clean the various parts of your hearing aids.
How to Clean Your Hearing Aid Ear Moulds
 To make cleaning hearing aid ear moulds easier, you can remove them from the tubing prior to cleaning.
An easy way to clean them is to wash them in warm and soapy water, making sure that you dry it properly before putting it back onto your hearing aid.
Make sure to never get water on the body of your hearing aid as it will damage it.
To avoid mixing up your ear moulds, make sure that you do each side separately. You can also clean the vent of the ear mould by using a vent cleaner to remove any wax that is stuck in the vent.
Vents are extremely important for the aeration of your ear canal when wearing a hearing aid and prevent occlusion. Therefore, cleaning hearing aid vents is very important and should be done any time you see wax build up.
How to Clean Your Hearing Aid Earpiece

While ear moulds can easily be removed and cleaned, other earpieces such as those who hold the speaker or custom hearing aids require different cleaning techniques. For moulds with speakers, they should never be submerged in water as there are electronic present inside the mould. These moulds have wax filters that require regular replacement.
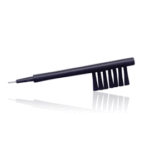
The vent of this mould can be cleaned using a brush that is inserted and carefully twisted in the hole to remove any wax.
For hearing aids that are entirely in the ear, you must be more cautious when cleaning as all of the electronics of the hearing aid are inside. An important part of your custom hearing aid that you can focus your cleaning on is the microphone port. Wax, dust, and dirt can get caught in your microphone port, all of which can affect its performance.
You can clean the port using a wax brush, and gently brushing away visible debris. Make sure that you face your hearing aid downwards so that the debris can fall out as opposed to staying in the port. For cleaning hearing aid vents, simply insert the brush carefully through the vent while twisting ever so slightly so as not to damage the vent.
This will remove any build-up of wax or dirt, and prevent occlusion. An important tip is to put something soft under where you are cleaning your hearing aid so that if you drop it while cleaning, it will not be damaged. Once you are done, you can clean the entire hearing aid using a dry and clean cloth.
How to Clean Your Hearing Aid Tubing
Similar to when cleaning hearing aid ear moulds, your hearing aid tube can also be removed. Once carefully removed, to prevent stretching the tube, you can clean it with warm and soapy water.
Ensure that the tube is completely dry before replacing it on your hearing aid. You can also use a wax pick to remove any large pieces of wax that are lodged into the tube.
If wax is left to build-up and harden in your tube, it will become harder for sound to be transmitted into your ear canal. Aside from wax, moisture can also become trapped in your tubing. This moisture is mostly condensation that comes from the ear canal.
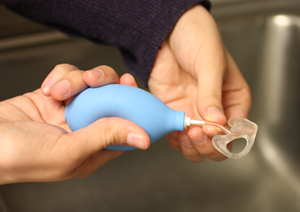
To remove this moisture, you can use a hearing aid air blower to push it out. In the situation where your tubing receives damage, you must buy a replacement immediately as it will have an effect on how sound is sent your ear canal.
How to Clean Your Hearing Aid Domes
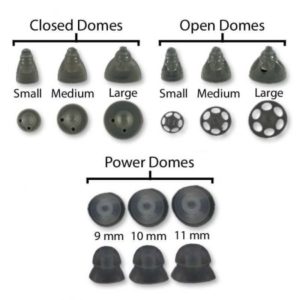
Domes are an alternative for ear moulds, and can be used with slim tube behind-the-ear (BTE) or receiver-in-canal (RIC) styled hearing aids.
The biggest difference between domes and ear moulds is that unlike ear moulds that require an impression and are rarely replaced, domes come in a variety of pre-made shapes and sizes, and require replacement.
What does this mean in terms of cleaning hearing aid domes? You do not have to! When your hearing aid domes requires cleaning, you simply need to remove the dirty dome, and replace it with a new one. How often you need to do it will depend on what your audiologist tells you, but it may be at least once a month.
This can be done by pulling off your dome from the tubing. However, be careful to not pull on the tubing of the hearing aid when removing your dome. To put on a new one, click it back onto the tubing.
Regardless of how often you do the cleaning yourself, it is important to make appointments with your audiologist for checks and deep cleaning in places that you have missed or have been to unsure to do yourself, such as the wax filter. Do not feel pressured to clean parts of the hearing aid that you are afraid of damaging, it is best to visit your audiologist than to damage your hearing aid and pay for repairs.
Contact us on 1300 848 335 today for a free, no obligation consultation with one of our qualified consultants.
